Archives: the healthy mix

Kuzu Root

Kuzu Root

I have found another miracle given to us in plant form. Kuzu – or you may know it as kudzu root. This particular root has managed to grow all across the southern states of the U.S. causing lots of headaches for many. Well, maybe if they knew how to use the kudzu in a medicinal way, then they would no longer have the headache!

The Chinese and Japanese cultures have used this starchy root to aid in the healing of many illnesses including colitis :). It is also used:

– To relieve tiredness and restore vitality.

– To treat digestive and intestinal issues such as indigestion

– For colds, which are often related to intestinal weakness.

– As a drink to relieve over acidity, bacterial infection and excess water in the case of diarrhea.

– To bring quick relief from abdominal pain and intestinal irritation.

– To combat alcoholism

– For anxiety and insomnia or sleep deprivation***

In addition to medicinal use, it is also used to thicken foods instead of using cornstarch.

This list can go on, but I’ll stop there. I think you get the point that this root has incredible medicinal properties. For me, I take it at night to help me sleep and lower any anxiety that I may be having. Of course I use it for my colitis as well, but love the fact that it helps me sleep better. Amazing…

Here’s how I use it before bedtime.

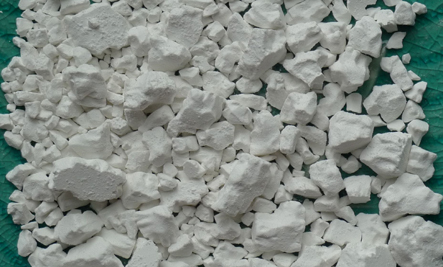
Take one spoonful of the starchy chunks and mix them with about ¼ cup of apple juice or any juice that you have around the house. You only need a small amount of juice to dissolve the root so you can drink it down. It doesn’t have a taste so there’s nothing to worry about with that.

You can buy kuzu in the Asian section of your grocery store or health food store where they sell the seaweed, soy sauce etc…

I think this is some really important information to help heal any gastro problems you may be having – or any anxiety that you might be experiencing.

Take this advice and use it well! Share it with others.

Sleep well.

Cinnamon hot cocoa has been my new winter drink!

YUMMY

It’s super simple to make and tastes absolutely divine. Personally, I enjoy making my own hot cocoa instead of buying it in the package – but that’s just me.

Here are the ingredients you will need to make this delicious concoction:

1 heaping tablespoon unsweetened cocoa powder

2 tablespoons agave nectar

1 ½ cups unsweetened almond milk or regular milk

1 cinnamon stick

In a saucepan over medium heat – pour the milk in and heat it up for 2 minutes before adding in the rest of the ingredients. Then add the cocoa stirring well to clear up the clumps, add the agave and cinnamon stick.

Keep it in the pan until nice and hot stirring occasionally to get all the flavors to blend well together.

Then carefully pour into your mug with the cinnamon stick so you can continue to get those delicious flavors – curl up on the couch with a comfy blanket and enjoy!

Have you ever made hot sauce??

Me neither… but Chad, my husband, LOVES hot sauce and decided to buy every hot pepper available at Whole Foods for his recipe. As I sat in our living room the smells from the peppers started to make my eyes water. This wasn’t a problem because I knew all I had to do was open the window for some fresh air.

Then approximately 5 minutes later I heard a loud “OH NO” and saw Chad run to the bathroom to dab his eye with cold water. Oh boy… hot pepper in the eye.

I knew this would happen! Of course, me being the home remedy nerd, I began my search immediately.

Here’s what I found and let me tell you – it really worked!!

Take your salt shaker and sprinkle some sea salt directly onto your tongue – voila! – it should start working immediately. When sodium enters the body it helps the lacrimal of the eyes to flush acids and counteract the burning sensation really fast.

What a great tip to keep up your sleeve for the next time you accidentally touch your eyes while cooking with hot peppers!

Good luck!

Tonight everything has changed in the hamburger world. Every time I attempt to have any type of burger I’m stuck with the plain burger and no bun. Tonight, everything’s changin! My excitement about this new GF hamburger bun (that’s actually not filled with total junk) is soaring high!

On this fine night we decided to make grass-fed ground beef burgers and as we walked around Whole Foods we actually came across gluten free hamburger buns! If only you could have seen the excitement in my eyes as we quickly threw the package into our cart.

I’ve never been so happy about a hamburger bun before and boy was it worth every bit of hype. You see, I’m always the girl who makes sure her burger comes without the bun, not because I’m watching my carb intake, but because my body can’t tolerate the gluten that’s in the buns! Please check out Canyon Bakehouse for an incredible (healthier then all the rest) surprise.

We were so hungry when we got home from the market that we couldn’t wait to start cooking immediately.

I grabbed the ground meat, scallions, garlic powder, cinnamon and lime and prepared myself to make the best kickin’ burger around town.

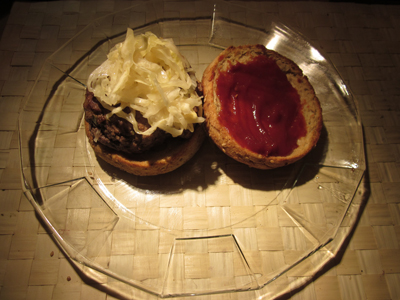
We toasted the buns, got out the ketchup, hot sauce (for Chad) and sauerkraut. YUMMY

The cinnamon gave it the most incredible hint of sweetness. According to Chad, we made the best damn burger that he’s had in NYC!

Here’s the recipe: This will make 3-4 burgers depending on their size

1 tablespoon olive oil

1 pound of grass-fed ground beef

2 scallions

1 teaspoon garlic powder

½ teaspoon cinnamon

½ a lime

Start by removing your meat from the package and place it into a mixing bowl. Chop your scallions using the green and white parts and add them in with the meat. Then add your garlic and cinnamon and mix together. Make your patties and set them aside on a separate platter.

Place a frying pan on the stove and pour in your olive oil. Heat on high until the oil is hot, then lower to a medium flame. Place your burgers in the pan and let cook, flipping when needed so both sides cook evenly. Take the lime and sprinkle some juice over each side of the burgers. Sprinkle some extra cinnamon on each side as you flip the burgers. Cook until desired and place on a plate with paper towel to soak up any extra oil.

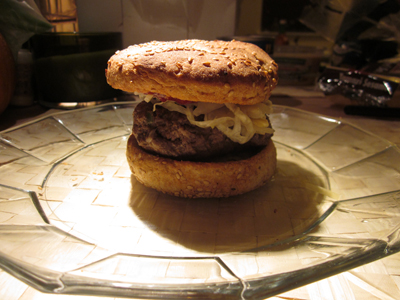
Load up your burger and enjoy!

GF burger!

GF burger!

Fully loaded burger

Fully loaded burger

Hi all!

I finally decided that I couldn’t take the smell of pizza while walking down these New York City streets – so I decided to do something about it! Amy’s pizza wasn’t cutting it anymore so I decided to take action! We had a pizza party and made our own pizza. This really was NOT hard at all – it just takes some really yummy toppings to make it all worth it. My mouth is watering as I type because I wish I could have it again – I just had it yesterday though and that really wouldn’t be healthy to have it two days in a row!

I used the crust recipe from The Gluten Free Almond Flour Cookbook author Elana Amsterdam from Elanas Pantry.

Crust:

1 ½ cups almond flour

¼ teaspoon sea salt

¼ teaspoon baking soda

1 tablespoon grapeseed oil

1 large egg

Topping can be of YOUR choice! Here’s what I used:

1 Tablespoon olive oil

½ medium yellow onion, diced

Handful mushrooms, washed and diced

Yummy store bought tomato sauce with a low amount of sugar. I like: Cucina Antica, tomato basil sauce

4 Fresh, colorful heirloom tomatoes because they were in season, otherwise you can use regular red tomatoes.

Handful fresh basil, washed and chopped into strips

Vegan cheese made from tapioca starch called Daiya.

Preheat the oven to 350 degrees F. Use a large baking sheet and prepare 2 pieces of parchment paper.

In a large bowl, combine the almond flour, salt, and baking soda. In a medium bowl, whisk together the grapeseed oil and egg. Stir the wet ingredients into the almond flour mixture until thoroughly combine.

Place the dough between the 2 sheets of parchment paper and roll into a 10-inch circle, 1/8 inch thick. Remove the top piece of parchment paper and transfer the bottom piece of parchment paper with the rolled out dough onto the baking sheet.

Bake for 15-20 minutes, until lightly golden. Remove from the oven and add toppings while still warm.

Toppings:

Heat oil in a small skillet and sauté the onions. When the onions are clear add the mushrooms and sauté together. Cut the tomatoes into bite-sized pieces and chop the basil.
When the crust comes out of the oven, pour on the tomato sauce, enough to cover the whole top. Then add the mushroom and onion mixture, tomatoes and basil. The last topping should be the vegan cheese, which will get sprinkled on the top – use enough to satisfy yourself.

This is simply delicious – enjoy it!

P.S. the picture below is only half of the whole pizza – it’s quite filling.

pizza

Dear friends,

My mom always told me how much I wanted to be in this world as a baby, meaning… I was born a month early and when she was giving birth, I literally flew right out – literally… the doc caught me (thank g*d!!) I always thought that was the main reason she used to say this, but low and behold there is more to the story. My mom decided that I was officially of age, being 24 and married, to know what really went on back then. It all started with my conception of course, but this wasn’t just any story of hey… we’re pregnant. No, my mother had an iud placed in her uterus, which is said to “have one of the lowest failure rates of any contraceptive method.” Picture that! My mother, using birth control with a very tiny chance of getting pregnant and BAM there I was growing in her belly. Then the dr. said she had to remove the iud to actually have a safe pregnancy and that she had a 50/50 chance of losing me. Clearly here I am, safe and sound.

Have you ever wondered what your mother was going through when you were growing inside of her? Was she happy, stressed, anxious? What was her relationship status? Were you breast-fed? Gosh, so many things start while we’re in the womb and we don’t even know about them until we’re old enough (whatever age that really is anyway.)

My point is this, do you really know who you are until you know all the factors that went into making you? Maybe this is a far off idea… or maybe not. It’s something to look into if you have the opportunity to do so. Maybe you’ll learn something about yourself that you never even knew. Ask questions until you feel satisfied – you deserve to know!

Good luck, and please write back if you find out anything that totally shocks you.

Dear friends,

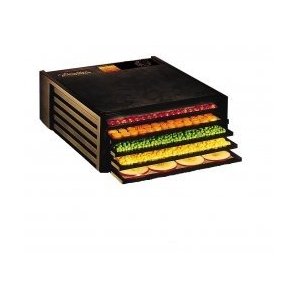
We are now the proud owners of the Excalibur food dehydrator!! Yes you heard right, we can now make our own dried fruit, fruit roll ups, raw treats, granola and lots more!

Clearly I am quite excited about this new addition to our tiny kitchen although we don’t have much space to store the new tool, but we will find a place – even if it has to hang from the ceiling! Kidding… but that’s a running joke around my apartment – we have to start sticking things to the ceiling so we can walk a straight line! I’m exaggerating a bit, but let’s put it this way, we need a new apartment JUST to have space for all our fun kitchen goodies.

For those of you who eat a raw diet or know someone who eats that way, this dehydrator is the perfect gift for him or her! I was so excited to try it out that I took whatever fruit we had in our fridge, sliced them and stuck them in the dehydrator for about 10 hours -maybe longer next time though – the mango looked SO delicious that we couldn’t resist. I will post pictures next time, but this time there just wasn’t enough, and it was gone within minutes that I didn’t even have time to reach for my camera.

Stay tuned for more raw yummy food from the Excalibur!
dehydrator